Installing a self-consumption solar kit is an increasingly popular step for households looking to reduce their energy expenses while contributing to a greener future. This guide will help you understand the issues and benefits of these systems, focusing on the best self-consumption solar kit for a simple and profitable installation.
Key Takeaways
- A self-consumption solar kit allows you to produce your own electricity to consume it directly, thus reducing bills and environmental impact.
- Essential components include solar panels, a micro-inverter, and a mounting system, designed for simplified installation.
- Choosing the right kit power is crucial and depends on your base electricity consumption (consumption floor).
- Installation is generally accessible to individuals, with clear steps for preparation, mounting, connection, and configuration via an app.
- Opting for kits with long warranties (30-year panels, 20-year micro-inverters) ensures a sustainable and profitable long-term investment.
Understanding the Best Self-Consumption Solar Kit
Definition and Operation of a Solar Kit
A self-consumption solar kit is essentially a set of equipment that allows you to produce your own electricity from the sun. The idea is that the energy you generate is consumed directly in your home, rather than being fed back into the public grid. It’s a way to become a little more independent from your usual energy supplier. The main goal is to reduce your electricity bill while doing something for the planet.
The principle is quite simple: panels capture sunlight and convert it into electricity. This electricity is then made usable by your household appliances thanks to a micro-inverter. It’s a technology that aims to be accessible, even if you’re not a DIY expert. Solar self-consumption allows you to control a part of your energy consumption.
Essential Components of a Self-Consumption Kit
For a self-consumption solar kit to work, several elements are necessary. These generally include:
- Photovoltaic Solar Panels: This is the heart of the system, the part that captures sunlight. There are different types, but for self-consumption, high-performance models are often preferred.
- Micro-inverter: This converts the direct current produced by the panels into alternating current, compatible with all your domestic electrical appliances. Each panel often has its own micro-inverter.
- Mounting System: Essential for securely installing the solar panels on your roof or on the ground. The robustness of this system is paramount.
- Cables and Connectors: To connect all these elements together and to your home’s electrical system.
Some kits, like those from Alma Solar, are designed to be complete and easy to install from the outset.
Why Opt for Solar Self-Consumption?
Embarking on solar self-consumption offers several interesting advantages. Firstly, there’s the economic aspect: by producing your own electricity, you reduce your dependence on market price increases. Savings can be significant in the long term. Secondly, it’s an ecological step. Producing your own renewable energy helps reduce the overall carbon footprint.
Solar self-consumption is a concrete response to current energy challenges, offering both an economic and environmental solution for households. It allows for regaining some control over energy consumption.
Finally, there’s the gain in autonomy. You are less subject to the vagaries of the electrical grid. It’s a way to equip yourself for the future, by investing in clean and sustainable energy. Kits like the JA Solar 1500W are, for example, designed for intermediate production, suitable for many households.
Economic and Ecological Benefits of Self-Consumption
Opting for solar self-consumption is a wise choice for both your wallet and the planet. This approach allows you to regain control over your energy consumption and reduce your environmental impact.
Significant Reduction in Electricity Bills
One of the most immediate benefits of self-consumption is the notable decrease in your energy expenses. By producing your own electricity with your solar panels, you consume less energy from the public grid, whose prices are constantly rising. This energy independence translates into concrete savings from the first month. The surplus energy you produce can even be sold, generating additional income.
Installing a self-consumption solar kit is a profitable investment that amortises its initial cost through long-term savings.
Contribution to the Energy Transition
Beyond financial advantages, solar self-consumption is a strong commitment to the environment. Every kilowatt-hour (kWh) produced locally by your solar panels is renewable energy that avoids the use of fossil fuels. You thus actively participate in reducing greenhouse gas emissions and combating climate change. It’s a concrete way to make your home more sustainable and contribute to a cleaner energy future. Photovoltaic solar panels help reduce CO2 emissions and lower electricity bills.
Gaining Energy Autonomy
Self-consumption gives you greater control over your electricity supply. You become less dependent on energy market fluctuations and potential grid outages. This independence is particularly valuable in areas where supply may be less reliable. By coupling your solar installation with a storage battery, you can even ensure a continuous power supply, even when the sun isn’t shining, transforming your home into an autonomous energy island.
Here are the main advantages of energy autonomy:
- Reduced dependence on traditional energy suppliers.
- Better resilience against grid failures.
- Possibility of powering your home even during a general power outage.
- Increased property value thanks to a modern and ecological installation.
Choosing the Right Power for Your Solar Kit
For your solar installation to be truly profitable, it needs to match your needs. It’s not just about putting on as many panels as possible. You need to consider what you actually consume.
Assessing Your Consumption Floor
The « consumption floor » is the minimum amount of electricity your home uses constantly. Think of the fridge, standby devices, the internet router. You can find this information on your Linky meter by looking at the displayed power when you’re sure nothing else is running. Understanding this figure is the first step in sizing your kit. It gives you an idea of the production you need to cover part of this base consumption. For example, a 300W solar kit may be sufficient to offset some of this constant consumption, especially if you use energy-efficient appliances.
Adapting Power to Your Daily Needs
Once you know your base consumption, look at how you use electricity during the day. Which appliances do you use most? When? A solar kit with power measured in peak watts (Wp) should be chosen based on these habits. For example, if you use a lot of high-energy appliances in the evening, a higher power, or the addition of a battery, might be relevant. You need to find a balance so that the energy produced matches what you consume, in order to maximise savings.
Modulating Your Installation According to Your Objectives
Your project can evolve. Perhaps you’re starting with a small kit, but plan to add another one later. Or maybe you want to cover part of your needs, without necessarily aiming for total autonomy. Plug-and-play solar kits are often modular. You can start with a single panel and add extensions if needed. It’s important to check the compatibility of extensions and respect the power limits per electrical circuit, often set at 900 W. Also consider the orientation and tilt of your panels to get the best possible production, as this directly impacts the performance of your solar installation.
Here are some examples of power ratings and their potential uses:
- 100-300 Wp: Ideal for offsetting standby appliance consumption, charging electronic devices, or powering LED lighting.
- 300-600 Wp: Can cover a significant portion of the consumption of a refrigerator, a washing machine used during the day, or a small water heater.
- 600-1000 Wp: Allows for covering a larger share of a household’s needs, potentially including appliances like a computer, television, or even an air conditioner for a few hours.
The choice of power should not be made randomly. It involves a precise calculation between your actual consumption and the kit’s production capacity. An ill-suited power can lead to energy losses or a less profitable investment than expected.
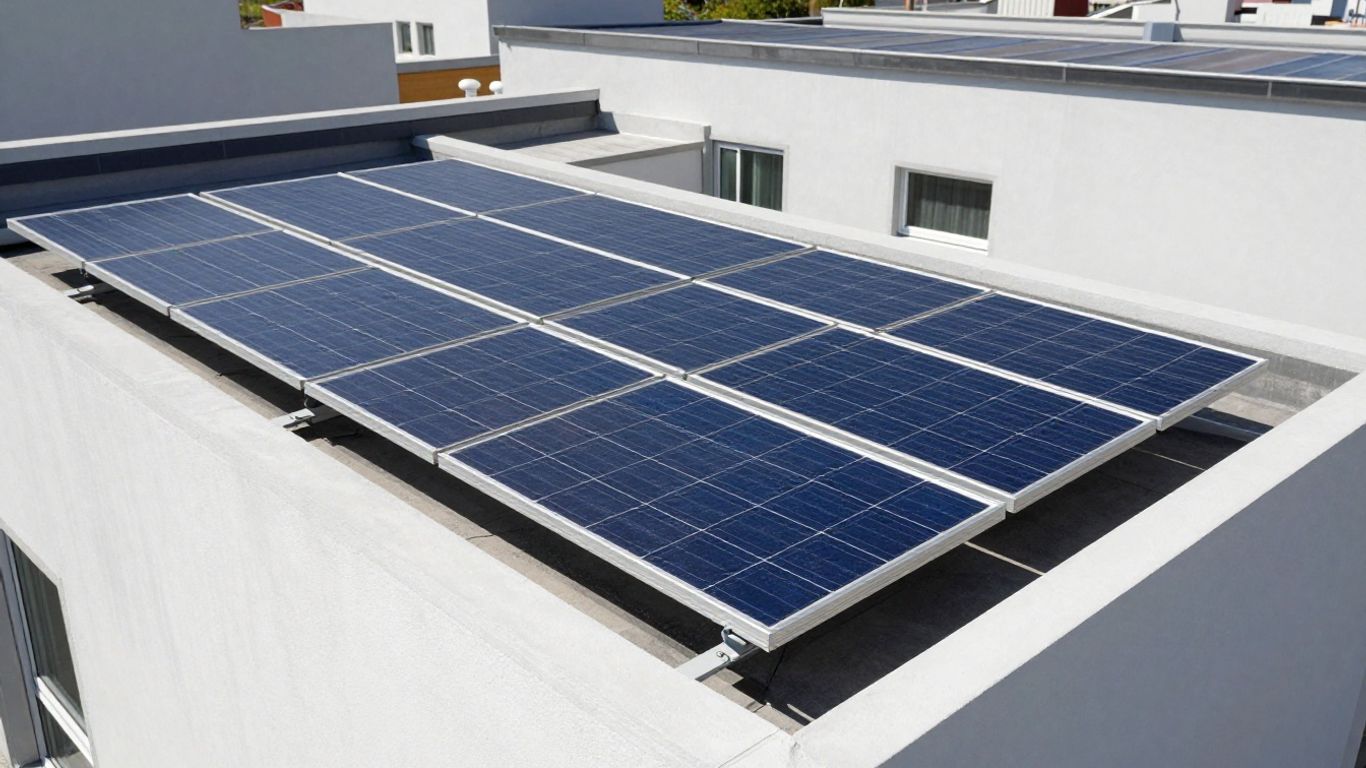
Simple Installation of Your Self-Consumption Solar Kit
The installation of a self-consumption solar kit is designed to be accessible, even without being a DIY expert. The goal is to make solar energy production available to everyone. Here are the key steps for a successful and safe setup.
Roof Preparation and Securing
First and foremost, it’s important to check that your roof is suitable. This includes its orientation (ideally south-facing), its pitch, and most importantly, its strength to support the weight of the panels. Once this check is done, you will proceed with fixing the support hooks. You must carefully follow the instructions provided with your kit to ensure a stable and secure base. This step requires precision to ensure the longevity of the installation.
Mounting Solar Panels and Rails
Once the hooks are in place, the next step is to install the rails. These will serve as a support for the solar panels. You need to ensure they are properly aligned and securely fastened to the hooks. Then, the solar panels are positioned on these rails. They are then firmly held in place using specific clamps. This mounting must be robust to withstand weather conditions, such as wind and snow. Good mounting is key to a durable installation.
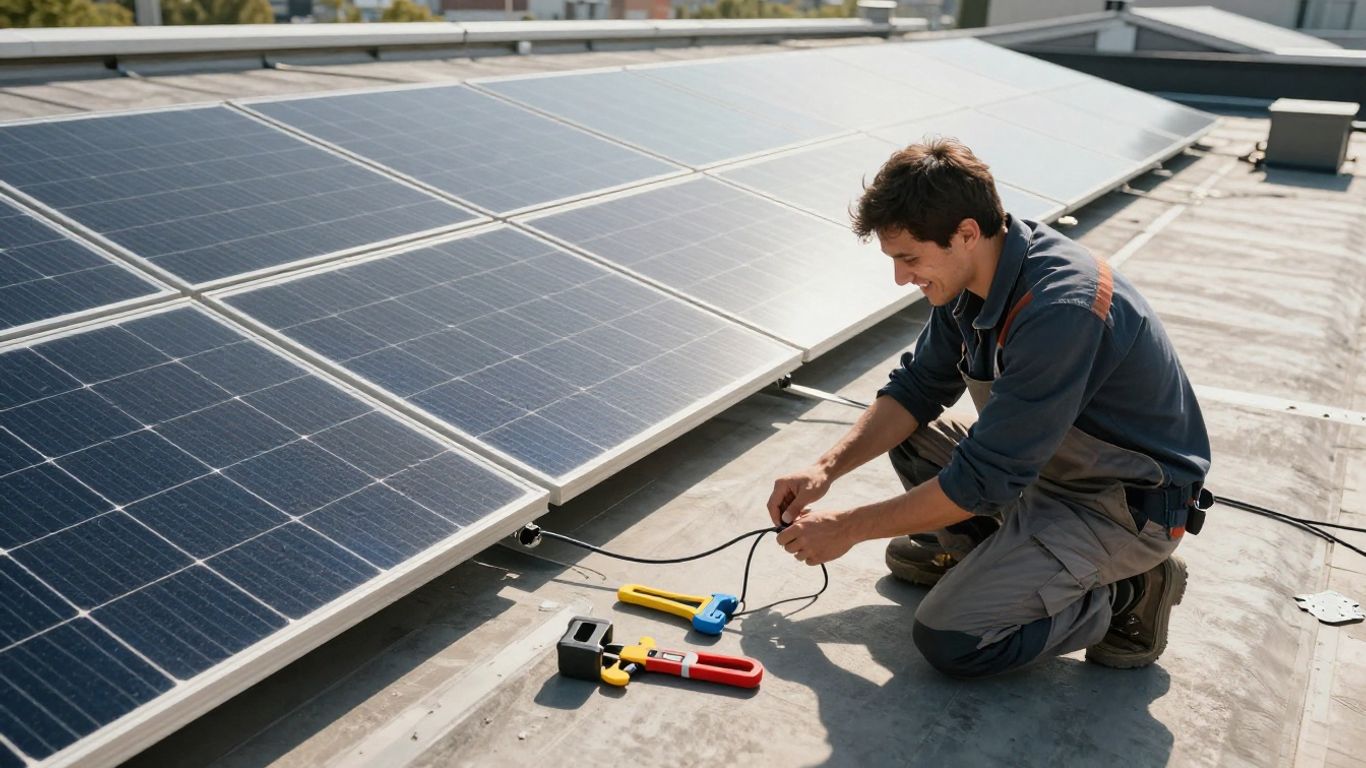
Connecting Micro-inverters and Wiring
Each solar panel is generally connected to a micro-inverter. This device converts the direct current produced by the panel into alternating current, usable by your domestic appliances. It’s important to correctly connect each panel to its micro-inverter. The QR codes of the micro-inverters are often necessary to link them to the monitoring application. Wiring must be done carefully to avoid any connection or safety issues. You can find detailed guides for installing your own system.
Configuring the Monitoring Application
Most modern kits include a mobile app or online platform to monitor your energy production. This app will guide you through connecting your equipment to your home Wi-Fi network. Once the configuration is complete, you can view in real-time the amount of electricity your panels are producing. This allows you to better understand your consumption and adjust your habits to maximise the benefits of your solar installation.
The installation of a plug-and-play solar kit is designed to be simple. However, it is always recommended to consult the instruction manual specific to your model and, if in doubt, to call on a professional for certain steps, particularly the final electrical connection to your home’s grid.
Quality Criteria and Warranties for a Sustainable Investment
When investing in a solar kit, you’re not just looking for a temporary solution. You want something that lasts and holds up in the long run. This is where the quality of the components and the warranties offered become very important. Not paying attention to this risks unpleasant surprises later on.
Durability of Solar Panels
Solar panels are the heart of your installation. Their performance can decrease over time, which is normal, but this decrease should be as slow as possible. Look at the power warranty: it indicates what percentage of the initial power you can expect after a certain number of years. For example, a warranty of 80% of nominal power after 25 years is quite good. Some manufacturers even offer extended warranties of 30 years. This is a good indicator of their confidence in their products. Also consider the physical resistance of the panels to weather conditions, although most recent models are designed to withstand wind and hail.
Reliability of Micro-inverters
Micro-inverters convert the direct current from your panels into usable current for your home. Their reliability is therefore crucial. A micro-inverter failure can render part, or even all, of your installation inoperable. Warranties on these devices are often shorter than those for panels, but a warranty of 10 to 25 years is a good sign. It’s best to choose reputable brands known for their reliability. If you opt for a kit, check that the micro-inverters are well-matched to the solar panels supplied. Good compatibility ensures better overall performance and avoids technical problems. For a hassle-free installation, it is advisable to familiarise yourself with electrical safety standards, such as the NF C15-100 standard, which governs electrical installations in France.
Robustness of the Mounting System
We tend to forget it, but the mounting system is also a key element. It must be robust to keep your panels in place, whatever the weather conditions. Whether for ground, wall, or roof mounting, the system must be adapted and well-designed. The materials used (aluminium, galvanised steel) play a role in durability. Check that the kit you choose includes a complete mounting system suitable for your type of installation. Some kits offer ballasting options for flat roofs, for example, which avoids drilling the waterproofing membrane. The quality of these fixings is as important as that of the panels themselves for the longevity of your project.
Choosing a solar kit is a bit like buying a car: you look at the make, the model, but especially the warranty and the manufacturer’s reputation. For solar panels, it’s the same. A good warranty is a promise of a product that will last over time, and for an investment like this, that’s really reassuring. You also need to consider ease of installation, as some kits are really designed to be mounted quickly, sometimes in less than 5 minutes per panel, which can make a noticeable difference. Plug-and-play solar kits are often highlighted for this simplicity.
Here is a comparative table of warranties for some popular models:
| Model | Material Warranty | Solar Panel Warranty | Micro-inverter Warranty | Power at 25 years |
|---|---|---|---|---|
| PLAY 2 | 25 years | 25 years | 25 years | 80% |
| Beem On | N/A | N/A | N/A | 80% |
| F500 | 25 years | 25 years | 20 years | 89% |
Optimising Your Energy Production and Consumption
Once your solar kit is installed, the next step is to make the most of your new energy source. This involves best matching your energy needs with the times when your solar panels produce the most. The goal is to maximise self-consumption, meaning directly consuming the electricity you generate.
Adapting Appliance Usage to Solar Production
For maximum efficiency, it’s wise to shift the use of your most energy-intensive appliances to daylight hours. Consider running your washing machine, dishwasher, or tumble dryer in the middle of the day. This way, you use free solar electricity rather than grid electricity. It’s a simple habit to adopt that has a direct impact on your bills.
Using Solar Energy for Charging
Take advantage of surplus solar production to charge your devices. This can include your electric bikes, scooters, or even your electric car if you have one. These devices often represent significant consumption, and powering them with your own solar production is an excellent way to optimise your installation. It also reduces reliance on public charging stations or your home grid during peak hours. Solar energy can even power your swimming pool pump, thus transforming sunlight into electricity for your garden [fd26].
Monitoring Production to Adjust Habits
Most modern solar kits are equipped with a monitoring app. These tools are invaluable for understanding your consumption and production in real-time. By regularly checking this data, you can identify the times when you produce the most and when your consumption is highest. This helps you refine your habits and better plan the use of your appliances. Optimising your self-consumption is a continuous process that improves with observation and adaptation. For example, if you notice you have surplus energy in the afternoon, you might decide to run your washing cycle at that time. This monitoring allows you to better control your energy budget and maximise the benefits of your solar investment [b8cf].
The general idea is to become more aware of your energy consumption. By aligning your energy-intensive activities with periods of high solar production, you mechanically reduce your reliance on the electrical grid. It’s an active approach that requires a little organisation at first, but quickly becomes second nature.
Comparison of Plug-and-Play Solar Kit Solutions
The market for « plug-and-play » solar kits has developed considerably, offering accessible solutions for those who want to produce their own electricity without major complications. These systems, designed to be plugged directly into an electrical socket, simplify self-consumption. But with such a variety of offers, how do you navigate? We will examine the technical characteristics, value for money, and installation options of the leading models.
Technical Specifications of Leading Models
Several players stand out in this market. The Sunology PLAY 2 kit, for example, offers a power of 450 Wp with a PV efficiency of 22.52%. It is often cited for its extended 25-year warranties. The Beem On, on the other hand, offers 500 Wp with similar technology, and positions itself as a more affordable option, with a particularly attractive price per peak watt. Finally, the Sunethic F500, also at 500 Wp, highlights its efficiency with a PV efficiency of 22.85% and high-quality components, including an APsystems micro-inverter.
Here is a comparative table to visualise these differences:
| Characteristic | Sunology PLAY 2 | Beem On | Sunethic F500 |
|---|---|---|---|
| Power (Wp) | 450 | 500 | 500 |
| PV Efficiency (%) | 22.52 | N/A | 22.85 |
| Price (€) | 599 | 459 | 690 |
| Price/Wp (€) | 1.33 | 0.86 | 1.38 |
| Warranty (material) | 25 years | N/A | N/A |
| Annual Production (kWh) | 360 to 630 | 400 to 700 | 400 to 700 |
*N/A: Not disclosed
Analysis of Value for Money
Value for money is a determining factor. The Beem On kit often stands out for its lowest acquisition cost, making it very attractive for an initial investment. However, the lifespan and warranties offered must be considered. The Sunology PLAY 2, although more expensive to purchase, offers very long warranties, which can make it more profitable in the long run. The Sunethic F500 is in a higher price range, justified by the perceived quality of its components and its high efficiency. It is important to note that the cost of a solar kit can vary, and it is advisable to consult current offers to get the most accurate prices.
The estimate of annual savings provided by manufacturers should be considered indicative. It depends heavily on your consumption profile and the price of your electricity.
Available Installation Options
Installation flexibility is another key point. Most plug-and-play kits are designed for ground or flat roof installation, often without requiring drilling thanks to ballast systems or integrated supports. The Sunology PLAY 2, for example, includes ballasting. The Beem On and Sunethic F500 also offer supports suitable for ground and wall mounting, with options for more specific fixings sometimes available. However, it is important to check compatibility with a standard residential roof, as this option is generally excluded for these kits due to safety regulations and increased complexity. Ease of implementation is a major asset, allowing installation in just a few minutes for most models.
It should be noted that the installation of these kits remains permitted, but it is advisable to comply with the power limits per circuit (900 W) and the recommendations of ADEME pending any regulatory clarifications.
The final choice will therefore depend on your priorities: initial budget, warranty duration, specific performance, or ease of installation at your location. For a broader view of costs, the price of a solar system can vary considerably depending on the power and components.
The Role of the Battery in a Solar Installation
When is it Relevant to Add a Battery?
Adding a battery to your self-consumption solar kit is not always an absolute necessity, but it can become very relevant depending on your consumption profile and objectives. If your main goal is to cover your consumption floor (i.e., the energy consumed by appliances that run constantly, such as the refrigerator or the internet router), a solar kit without a battery may suffice. However, to maximise autonomy and further reduce your dependence on the grid, especially when electricity prices fluctuate, a battery makes perfect sense. It allows you to store surplus energy produced during the day for use in the evening or at night, thus reducing reliance on the supplier’s electricity. This is a particularly interesting solution for second homes or areas where grid connection is less reliable. Adding a battery is therefore a logical step for those aiming for greater energy independence.
Storage Capacity and Estimated Autonomy
The battery’s capacity, measured in kilowatt-hours (kWh), is a determining factor for the autonomy of your installation. It defines the amount of energy you can store. For example, a 2.7 kWh battery may be sufficient to power essential household appliances for several hours, while a 1.6 kWh battery will be more suitable for occasional needs or less energy-intensive appliances. It is important to accurately assess your daily consumption to choose an adequate capacity. A battery that is too small will not provide the expected autonomy, while an oversized battery represents unnecessary cost. The estimated autonomy will depend on the battery’s capacity, the power of your solar panels, and your consumption habits. For example, a kit with a 2.7 kWh battery and 2,000 W panels can cover up to 70% of an average household’s consumption, representing substantial annual savings.
Impact of a Battery on Overall Profitability
Integrating a battery into your solar system has a direct impact on the overall profitability of your project. Although the initial investment is higher, a battery significantly increases your self-consumption rate. By using more of the energy you produce, you reduce your electricity bill accordingly. The return on investment must be calculated taking into account the cost of the battery, its lifespan (often between 10 and 15 years for lithium models), the savings made on your bills, and any available financial aid. It is also possible to sell surplus electricity that is not consumed back to the grid, which can improve profitability. For an accurate estimate, it is advisable to consult a professional who can analyse your specific situation and provide a personalised quote, taking into account the available financial aid.
Here is a simplified comparative table to illustrate the differences:
| Characteristic | Kit without battery (example) | Kit with battery (example) |
|---|---|---|
| Storage Capacity | Not applicable | 1.6 kWh to 2.7 kWh+ |
| Night-time Autonomy | Low | High |
| Initial Cost | Lower | Higher |
| Self-consumption Rate | Moderate | High |
| Grid Dependence | Higher | Reduced |
Cost and Financial Aid for Your Solar Project
Factors Influencing Kit Price
The cost of a self-consumption solar kit can vary considerably. Several elements play a role in determining the final price. The total power of the panels, expressed in peak watts (Wp), is a determining factor. The higher the power, the higher the initial cost, but this will also translate into more substantial energy production. The number of components included in the kit, such as micro-inverters, mounting systems, and any cables or connection boxes, also influences the price. Let’s not forget the warranties offered by the manufacturer and associated services, which can justify a slightly higher cost for a more serene investment. With some suppliers, the price per peak watt can be a good indicator for comparing offers.
Available Aid Schemes and Subsidies
To encourage the adoption of solar energy, several financial aid schemes are in place. You can benefit from the self-consumption bonus, the amount of which varies according to the installation’s power. The reduced VAT rate of 5.5% is also a significant advantage for installations on homes completed more than two years ago. Other local or regional aid may supplement these schemes. It is advisable to contact the relevant authorities or professionals to find out about all the subsidies available in your region. These aids aim to make investing in a solar installation more accessible and profitable. You can discover the aid available in 2026 on available solar aid.
Estimation of Potential Annual Savings
Installing a self-consumption solar kit allows for substantial savings on your electricity bills. The amount of these savings depends on several factors, including your annual electricity consumption, the power of your solar installation, and the sunshine in your region. On average, a household can expect to significantly reduce its electricity bill, sometimes covering a substantial part of its base consumption, known as the consumption floor. For example, a well-sized installation can cover up to 70% of an average household’s consumption, thus generating several hundred euros in savings each year. The return on investment is generally estimated over a period of 10 to 15 years, but it can be accelerated thanks to financial aid. Solar self-consumption is a step that combines savings and contribution to the energy transition, offering greater independence from traditional energy suppliers the advantages of self-consumption.
Here is a table illustrating potential savings:
| Kit Power | Average Annual Consumption | Estimated Annual Savings |
|---|---|---|
| 450 Wp | 1,000 kWh | €160 |
| 800 Wp | 1,800 kWh | €270 |
| 2,000 Wp | 4,500 kWh | €800 |
Choosing a European Supplier for Your Solar Kit
When embarking on solar self-consumption, one often thinks about the panels, the inverter, and how it will all integrate into the home. But there’s another aspect that deserves our full attention: choosing the supplier. And here, favouring a European player can make a real difference.
European Quality Standards and Manufacturing
Products manufactured in Europe generally adhere to quite strict quality standards. This is a sort of additional guarantee when purchasing a solar kit. We know that the components have been designed and assembled in compliance with precise standards. For example, some kits are assembled in France, which is a mark of expertise. This doesn’t mean that everything from elsewhere is of poor quality, far from it, but having European manufacturing is often synonymous with reliability and durability.
Advantages of Customer Service and Technical Support
Choosing a European supplier also often means ensuring more accessible customer service. Imagine: you have a technical question, a problem with your installation. Having a contact person in the same time zone, who speaks your language, and who understands local regulatory specifics, is much simpler. Technical support is generally more responsive, and the procedures for any intervention or replacement are smoother. This is a significant point for an installation that is meant to last for years.
Extended Warranties and Component Reliability
European suppliers tend to offer longer warranties on their products, whether for solar panels or micro-inverters. For example, you can find 20 or 25-year warranties on panels, and solid warranties on inverters. This confidence in the longevity of their equipment is reflected in the warranty conditions. Furthermore, some European manufacturers commit to using high-quality components, sometimes even of European origin, for their kits. This contributes to the overall performance and profitability of your investment in the long term. You can explore a range of plug-and-play solar kits that meet these quality and performance criteria.
A Solar Investment Within Your Reach
In summary, installing a self-consumption solar kit is an increasingly accessible and profitable endeavour. Whether to reduce your electricity bills, gain energy independence, or contribute to the planet, this solution meets many needs. The kits offered today are designed for simplified installation, often achievable by yourself, and offer solid long-term warranties, such as those for our solar panels guaranteed for 30 years. Don’t hesitate any longer to take the step towards greener and more economical energy.
Frequently Asked Questions
What exactly is a self-consumption solar kit?
Imagine a small system that captures sunlight to generate electricity directly in your home. You use this electricity immediately to power your appliances, instead of taking it from the electrical grid. It’s like having your own mini solar power plant at home.
What does a solar kit consist of to produce one’s own electricity?
A typical kit includes panels that capture the sun, a small box (the micro-inverter) that converts the energy so it can be used by your appliances, and a system to securely mount everything on your roof or elsewhere. There are also cables to connect everything.
Why choose to produce one’s own electricity with a solar kit?
It’s a great idea for several reasons! Firstly, it lowers your electricity bills because you consume less purchased energy. Secondly, it’s good for the planet because you use clean energy. And finally, you become a little more independent from the electrical grid.
How do I know which solar kit power is best for me?
You need to look at how much electricity you usually consume, especially when you are at home. Check your meter to see your minimum consumption (even when everything is off, some appliances are running). This will help you choose a kit whose power matches what you use most often.
Is it complicated to install a self-consumption solar kit?
Modern kits are designed to be easy to install, a bit like ‘plug and play’. You need to prepare the location where you will place the panels, fix them securely, then connect the various components. If you follow the instructions carefully, it’s entirely feasible.
What are the important criteria for choosing a good solar kit?
You need to look at the quality of the solar panels and micro-inverters, as they need to last a long time. Also check the robustness of the system that holds the panels. The warranties offered by the manufacturer are also a good indicator of the product’s reliability.
Is it useful to add a battery to my solar kit?
A battery is like an energy reserve. It allows you to store electricity produced during the day to use it in the evening or at night, when there is no more sun. It’s relevant if you want to maximise your autonomy or if you are not often at home when the sun is shining.
Are there any financial aids available for purchasing a solar kit?
Yes, there are often aids and subsidies to encourage the installation of solar panels. The government may offer bonuses or reduced VAT rates, for example. These aids can make the investment even more attractive and reduce the overall project cost.